In today’s digital age, the saying “the best camera is the one you always have with you” holds true, especially for iPhone users who capture countless memories on their devices. While Apple’s Photos app is handy for managing these photos, relying solely on it is risky. Imagine losing or breaking your iPhone and losing all those precious memories in one go.
To prevent this nightmare, you can diversify how you store photos. Spread memories across platforms and storage methods, like not putting all eggs in one basket. Besides making copies, use cloud services or external hard drives. These add security layers and enhance accessibility across devices and locations.
So, while the Photos app is great for organizing your iPhone pictures, it’s smart to take additional steps to keep your memories safe. With a diversified approach and proactive measures, you can enjoy your digital collection without worrying about losing it all in one fell swoop. (Via: DigitalTrends)
The Importance of Keeping Backups of Your Photos
Even if you’re diligent about backing up your iPhone to iCloud or your computer, it’s wise to keep separate backups of your photos. Why? Retrieving photos from a folder or a dedicated photo app is easier than from an iCloud or computer backup.
Consider this: accessing photos from a backup requires restoring them to another iPhone or using specialized software tools. This process is more cumbersome compared to simply opening a folder or an app where photos are stored separately.
By maintaining separate backups, you make accessing photos easier and ensure added security, providing peace of mind knowing your cherished memories are readily available.

Apple provides convenient methods for transferring iPhone photos. iCloud Photos syncs across iPhone, Mac, or PC. Third-party cloud apps like Dropbox offer alternative syncing options. For those wary of cloud storage, traditional methods exist. USB connection allows direct transfer. Apps can upload to NAS over Wi-Fi for secure transfer.
Users can choose the method aligning with their preferences for a secure transfer of their photo collections.
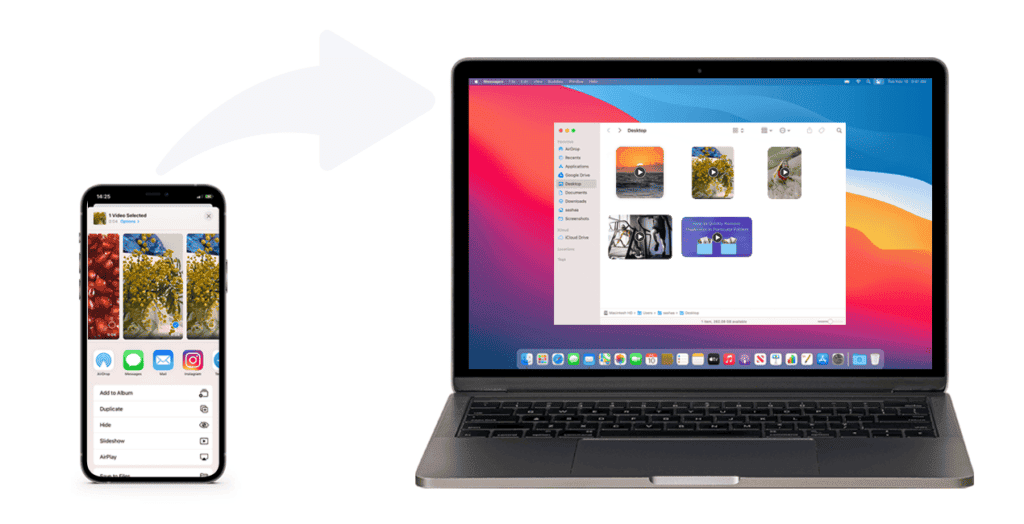
How To Transfer Photos to Mac using a Cable
Transferring photos from your iPhone to your Mac via a USB cable may seem old-fashioned in today’s wireless era, but it remains the simplest and quickest method. Whether you’re using a USB-C to USB-C connection with the latest iPhone 15 models or an older USB-to-Lightning connection, the process is straightforward: your iPhone appears on your Mac like a traditional digital camera, allowing you to download photos using macOS’s built-in photo import tools or any third-party photo transfer utility or management app of your choice.
Since you’re working with a wired connection, it’s typically faster than wireless methods. Most iPhone models transfer pictures at USB 2.0 speeds of around 480Mbps, while the latest iPhone 15 Pro and iPhone 15 Pro Max support USB 3.2 speeds of up to 10Gbps, enabling you to offload even large photo libraries in minutes.
Here is How To Do It:
- Step 1: Unlock your iPhone and connect it to your Mac using the appropriate USB cable.
- Step 2: If it’s your first time connecting your iPhone to this computer, you’ll receive prompts to trust the connection on both devices. Select the Trust option when it appears on your iPhone screen and confirm the connection on your Mac. If prompted, enter your iPhone passcode.
- Step 3: After connecting your iPhone to your Mac, open either the Photos app or Image Capture.
Photos on iPhone and Mac will be Two Separate Things
If you choose Photos, you’ll find it functions similarly to the Photos app on your iPhone. You can view and manage your photos here, though remember, when transferring via USB cable, it’s a one-way process. While you can organize your photos into albums on your Mac, they’ll remain separate from any albums you’ve created on your iPhone unless you’re using iCloud Photos to synchronize them via the cloud.
Gizchina News of the week
- Step 4: In either Photos or Image Capture, locate and select your iPhone from the left-hand sidebar.
- Step 5: If you’re using Image Capture, after selecting your iPhone, click on the drop-down menu beside “Import To” and choose the destination folder where you want your photos to be saved.
- For Photos users, you have the option to click on the drop-down menu beside “Album” to organize your imported photos into an existing album or create a new one.
- Step 6: To transfer all photos from your iPhone to your Mac, use the “Download All” option in Image Capture or “Import All” in Photos.
Alternatively, you can individually select specific photos by clicking on them, then use the “Download” or “Import” buttons to transfer only the chosen images.
Keep in mind that in Photos, selecting “Import All New Photos” will skip any images previously imported to your library. However, if you opt to import individual images, duplicates may occur even if they’re already in your library.
How to Transfer Photos from iPhone to Windows Computers
Transferring your photos to a Windows PC via USB is almost as straightforward as it is on a Mac, thanks to Microsoft’s built-in photo import tools tailored for smartphones and digital cameras.
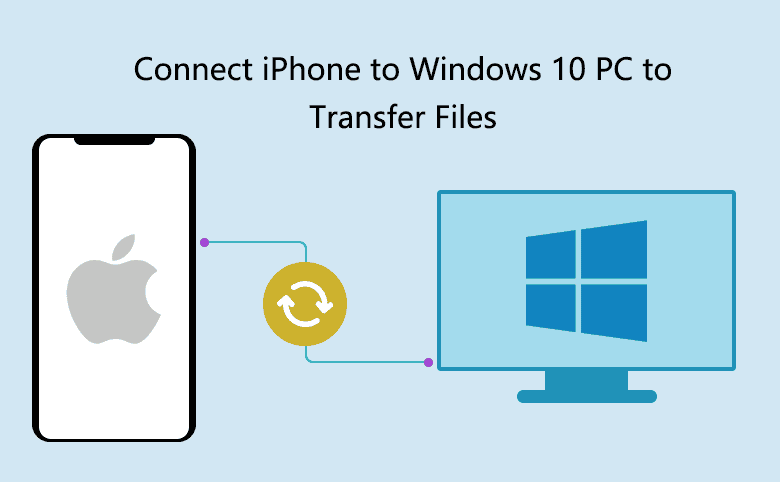
The only additional requirement is that, depending on your Windows version, you may need iTunes 12.5.1 or later installed or the newer Apple Devices app to ensure your PC recognizes your iPhone. Whether you download it from the Microsoft Store or directly from Apple’s website doesn’t matter; what’s important is that iTunes or Apple Devices is present and up to date. Once you have this set up, everything else unfolds within the native Windows apps.
- Step 1: Unlock your iPhone and connect it to your PC using the appropriate USB cable.
- Step 2: When a dialog box appears on your iPhone, select “Allow” to grant your PC access to your device’s photos and videos. Then, enter your passcode to confirm.
- Step 3: Open the Photos app on your PC.
- Step 4: Select Import near the top-right corner.
- Step 5: Select your iPhone from the list of connected devices that appears and wait for the content to load from your device.
- Step 6: Select one or more photo or video to import.
- Step 7: Select Add (#) items.
- Step 8: Choose the folder where you would like to save your photos and select Import.

How to Sync your Photos to Windows PC or Mac Using iCloud
To sync your photos to your Mac or PC using iCloud, you can utilize iCloud Photos if you have sufficient iCloud storage. However, it’s important to note that this method synchronizes your entire photo library across all your devices. That includes your iPhone, computer, iPad, and Apple TV. While this ensures all your photos are readily available across your ecosystem, it’s a comprehensive approach.
If you prefer managing your photo library with Apple’s Photos app and are willing to invest in iCloud storage, this is the optimal and most straightforward method. With it you can access your photos on your computer shortly after capturing them. Here’s how to set it up:
1. Ensure you have enough iCloud storage to accommodate your photo library.
2. On your iPhone, go to Settings, then tap on your name at the top to access iCloud settings.
3. Tap on iCloud, then select Photos.
4. Toggle on the iCloud Photos option. You may need to wait for your photos to upload to iCloud, depending on your internet connection speed and the size of your library.
5. Once your photos are uploaded to iCloud, they will automatically sync to your Mac or PC if iCloud Photos is enabled on your computer as well.
By following these steps, you’ll seamlessly synchronize your photos across all your devices using iCloud Photos, providing convenient access to your entire photo library on your computer.

The Bottom Line
Whether you’re transferring photos via USB, using iCloud Photos, or syncing with other cloud services, there are various methods to store your iPhone photos on your Mac or PC. Each has its advantages: the simplicity of USB, the comprehensive sync of iCloud, or the flexibility of third-party clouds.
The best method depends on your preferences, storage needs, and workflow. Regardless of the route, the goal is the same: safeguard your photos for easy access whenever you need them—for viewing, sharing, or preserving precious moments.